If you are the type of person who likes to improvise, take advantage of hacks to perform useful do It yourself projects, or utilize tools and equipment for a wide range of different unique needs, you are really going to enjoy what you learn in this article. Specifically, if you like to get the most out of the money that you spend by using your kitchen appliances for more multiple purposes.
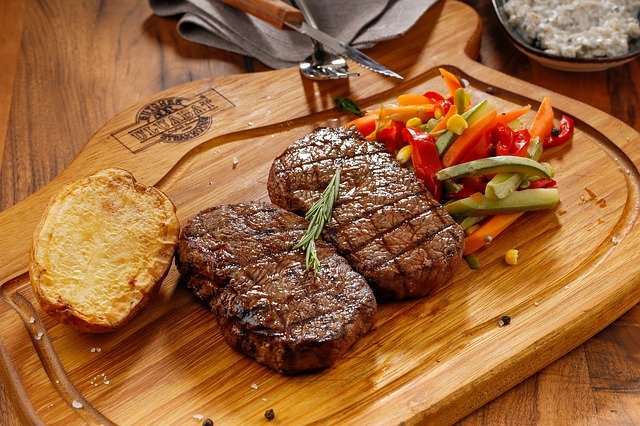
With that being said, for those of you who want to know a new way of preparing your steaks, this article will explain how to cook a steak in a Panini Press.
Step 1: Allow the steak to defrost before beginning the process
Just like preparing any kind of steak before placing it on the grill, there are a number of different things that you should do to make sure the steak is cooked properly. For instance, the steak that you are going to cook on your panini grill should be completely thawed out before the seasoning is added. For instance, in most recipes, people are usually instructed to place the steaks out on a plate and then let them remain until they reach room temperature.
Step 2: Gather all of the Desired Seasonings Using Your Favorite Recipes
Once the steak has been defrosted, the person that is doing the cooking should take out all of the seasonings. The seasonings will often vary based on the recipe so people should follow the one that they like and prefer best. For instance, the following basic seasonings will make a great tasting steak for anyone that enjoys savory flavoring.
Seasonings:
- 1 tablespoon olive oil
- Sea salt
- Ground black pepper
- Horseradish
- Mustard
- Steak sauce
- Other condiments, if desired
- Meat thermometer
Step 3: Prepare the Meat for the Panini Press
First of all, rub 1 tablespoon of olive oil on each side of the steak. After this part of the preparation is complete, the steak should be seasoned with a pinch of sea salt, 1/4th teaspoon of black pepper (freshly ground pepper provides the best flavor), and then add the other condiments according to taste.
Step 3: Preheat the Panini Grill
Preheat the Panini grill by turning its dial to the grill setting and then make sure that it is adjusted to high heat. Based on the model of the panini grill that is used for this preparation, a green indicator light will appear when it is turned on.
Step 4: Place the Steak on the Press
Place the steak on the Panini press and then close the top lightly.
Step 5: Cook the steak based on the following simple instructions
Cook your steak in the press for at least 7 to 10 minutes. To make sure the steak has cooked properly, you will need a meat thermometer to monitor the status of it until it is completely done on the inside. For instance, the internal temperature of the steak should reach 140 degrees Fahrenheit. Also, as you allow the steak to rests for few minutes outside of the panini press, the temperature will begin to rise another 5 degrees.
Before serving the steak to your family, you should allow the steak to rests for few minutes outside of the panini press.
The Best Tasting Steak You’ve Ever Had (On a Panini Maker!)
Would you believe it if we said that your Panini press was capable of making a steak better than your grill? I know, it is sacrilege to even bring it up. The only thing that a Panini press can make better than an actual grill is toasted sandwiches, but that’s wrong. Your Panini press can be so much more, and if you aren’t using it for so much more, you are missing out.
That being said, if you try to cook a steak on a Panini press the same way you would on a grill, you are setting yourself up for disappointment. A grill and a Panini press are similar, but still two different beasts. This point is driven home even more so if you happen to land on the charcoal side of the great propane versus charcoal grilling debate. When using a Panini press, you don’t get the same opportunities for natural flavor as you do on the grill. You know what, though? When it comes to flavor on a steak, you can make it. Of course, you need to make it so it works with that great cut of beef and doesn’t just cover it up.
Making the Marinade
There is some charm to just seasoning a steak in salt and pepper then putting it on the grill. When you have really good beef, the meat can speak for itself. However, the key to cooking the perfect steak on a Panini press is in a quality marinade. You still get those grill marks and caramelization that lend to great flavor in a steak on both the grill and the Panini press, but especially if you use charcoal, you miss out on that smoky flavor.
There are probably a hundred different steak marinades that would impart wonderful flavor toy our Panini press steak, and that is the beauty of it. If you get bored with one flavor, there are so many others to try. However, we have a favorite and that includes:
- ¼ cup of red wine vinegar
- 1 minced clove of garlic
- 1 tsp of salt
- ½ tsp of lemon zest
- ½ tsp of lemon juice
- ½ tsp of ground black pepper
- 2 tsp of dried oregano
- 1 cup of olive oil
By mixing all the above together until the salt is dissolved, you have created one tasty marinade. Put your steaks so that they can lay flat in a roasting pan. For this step, it is best to use glass or other nonreactive materials since metals can impart a bit of an undesired metallic taste to meat.
As you add the marinade, you should use just over half of the mixture. The rest should be set aside for basting during the cook process as well as before serving. After flipping the steaks to make sure both sides are coated, let marinate for 1 to 2 hours. You can certainly marinate longer, but it is not recommended. The meat will be more tender, but after about 4 to 6 hours, that flavor will completely overtake the beef. There is also a problem with texture after long marinades as well, so just always drift towards the low end of the time scale.
Grilling on a Panini Press
Grilling on a Panini press is actually way easier than grilling on an actual grill. No matter if you use propane or charcoal, you still have to control the temperature and flame for even and well timed cooking. However, the Panini press does all that for you, but, as with all things simple, cooking on a Panini press is as simple as you let it be. If your Panini press has temperature controls, unless otherwise marked, use the temperature that you use for sandwiches. If your Panini press doesn’t have a temperature control, it is even easier since you don’t have any other options to tempt you.
For a nice medium rare, you should only need to cook your steak pressed between the plates for about six minutes. For well done, you will want to raise that time to more like 10 minutes. It is important that every two or three minutes of cook time you open up the press and baste with the remainder of the marinade then flip them. If you aren’t basting, then there is no reason to flip your steaks on a Panini press, but if you are, you don’t really have a choice. Our only advice is try to line the grill marks up as best as you can for deep, even char lines as you flip.
You should also not lock the top or add excess pressure to the steaks. One of the many reasons people don’t want to cook steaks on a Panini press is because they think it will press all the juices right out. However, that is only true if you let it be and press the plates tight together unnecessarily. The top lid of a Panini press isn’t heavy enough to press juices out alone, so just let it be.
Finally, after your designated cook time, you want to give one final baste with the marinade and serve hot. However, like with all steaks, let it rest for about five minutes off the heat. This allows time for the steak to reabsorb its own juices that were brought to the surface from the cooking process and while it is doing that, it is also absorbing some of that basting marinade as well for deeper flavor. Usually you get this resting time naturally as people get sides on their plates so you won’t end up just sitting there and staring at an amazing piece of cooked meat.
If you want the perfect bread to go along with your panini grilled steak! Check out our Best Bread for Panini article!


